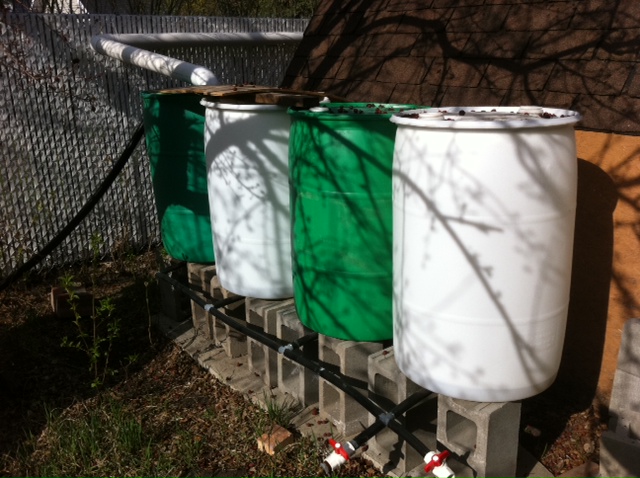
The plan was simple. Turn the entire front and back yards into raised bed gardening areas and grow our own fruit and vegetables. Well, with a big yard and lots of raised beds, we were going to need a LOT of water. This is the quad rain barrel water collection system I built for the back yard. It’s a neat little diy water saver system that anyone can make use of.
Four Rain Barrels Connected In Series

Four rain barrels, connected together by pipes from the bottoms. Not sure where I got the idea for this but it makes a lot of sense actually.
- All rain barrels fill as a single unit
- Utilizes a single garden hose connection point
- Weight of rain water should theoretically create more pressure in hose
- Any worm compost tea added to one barrel would be dispersed to all water
- Neighbors will think you’re quite the inventor when they see it
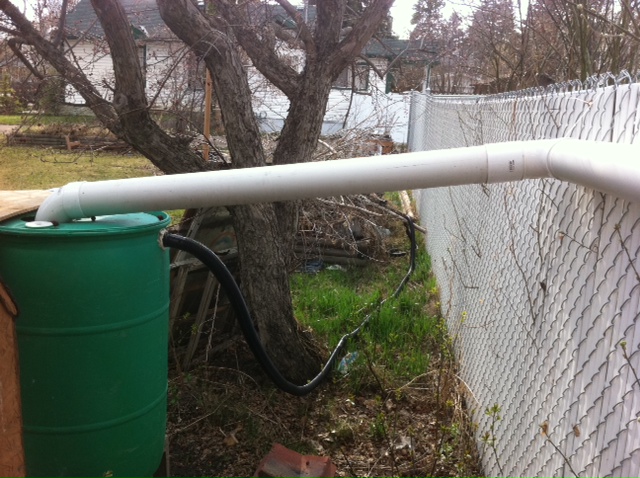
You’ll see how the PVC pipe at the far end empties rain water into only one of the barrels. As it fills, the other rain barrels fill as a single unit as the water level remains the same throughout the system.
Building The Quad Rain Barrel System
First consideration was where the rain barrel water collection system was going to go. Then the height of the barrels had to be taken into account. Or rather, the height of the bottom of the barrels which would allow water to flow. Then connecting the barrels in series using elbows and pipe. Then setting them up so they could rest with enough support but still account for the bottom connectors. Finally, the 80 foot run of PVC pipe that carries rain water from the eaves to the barrels.
Building The Final Resting Place For The Barrels

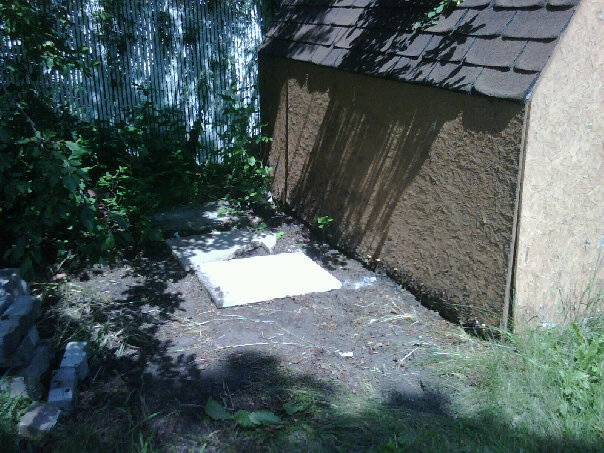
Sidewalk blocks are on the ground level, you can see three of them here. Basically, a solid flat foundation on which to rest the cinder blocks.
Bottom Connections In Rain Barrels

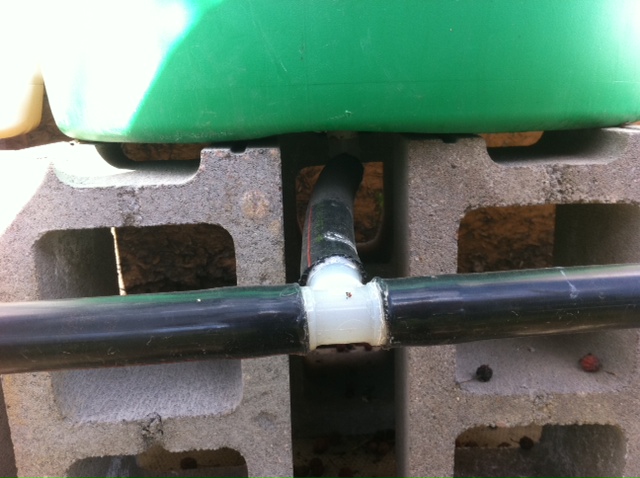
I bought elbow connectors for the bottoms of the barrels. Drilled a hole in the barrel to match and then glued it in place so that there was as least amount of lip left inside the barrel. I was trying to have the elbow level with the inside as much as I could. A small piece of black plastic pipe was connected to one end and allowed to dry before gluing the elbow into the barrel.
Barrels Sitting On Cinder Blocks

With the rain barrels being connected by their bottoms, I had to sit each one on top of three up-ended cinder blocks. This allowed for some additional height and the connector pipes being unobstructed.
I prepared 2 rain barrels at a time, sitting them upside down and connecting them with T connections to the main flow pipe. Then, when it came time, they were turned right side up and the pairs connected.
Height of Rain Barrels
I wanted to have the barrels high enough so that gravity would feed the water to the raised beds. First layer was simple sidewalk blocks and then each barrel has three up-ended cinder blocks that they rest on. This allows for the pipe on the bottom to sit unimpeded (more on that later).
What I hadn’t considered when i first decided on the height of the final rain barrel water collection system was the distance of the run of PVC pipe that brought water from my eaves to the barrels (More on that later as well.)
In the end it seemed to have worked out well.
Planning For Expansion

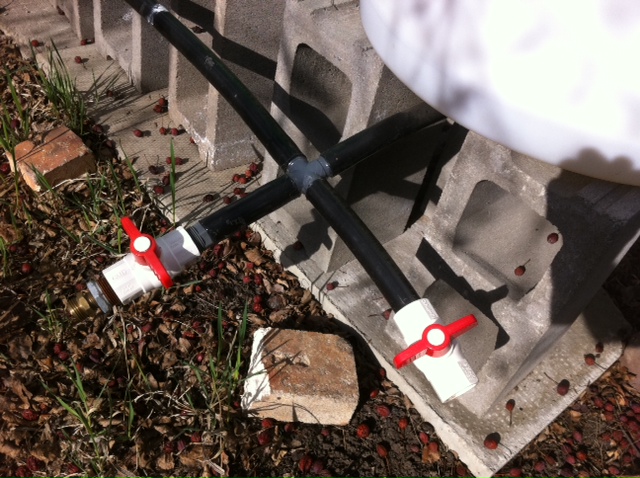
The hose connection was placed at the end farthest away from the fence, and closest to the actual garden. I saw another guy who planned in an expansion connector and thought it would be a good idea as well. This allows me to add a few extra barrels at a later time if I so desire. This connection uses a 4 way connector, not a T.
Routing Rain Water From Eaves To Rain Barrels
My shed sits on the far side of my garage, so to get the water from the eaves down spouts all the way from the front of my house, past the garage and then out past the shed required an 80 foot run of 3″ PVC pipe. I chose 3″ over 2″ just in case of any water sitting in it and freezing. I figure that the extra inch might allow for anything I may not have expected.
Planning The Slope To Allow Water Flow
With an 80′ run of pipe, the far end of the PVC has to be quite a bit higher than the end that empties into the barrels. The rain barrel end is already 4′ off the ground, and so I found that the far end had to be nearly 8′ high.
My neighbor had recently put in a new fence and I asked her permission to attach my pipe to it, explaining it would in no way interfere with the fence. In one spot, the pipe made use of a natural notch in a tree and for the rest of it, I had to put in braces and supports. Generally though, it was simply “zip-stripped” to the fence using zip ties.
Using String as a Guide
I cannot remember the formula we used for the slope, but for proper drainage, for every 10 feet of pipe, the pipe has to drop a certain amount. For 80′ of pipe run, I seem to recall it worked out to 2′ of drop. We ran a length of string from one end to the other with the slope figured in and tied securely.
Then when we connected all the pipe lengths together, followed the slope of the string as best we could.

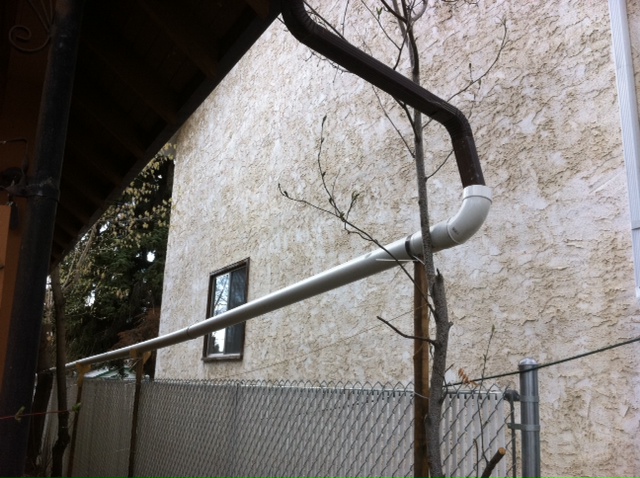
The furthest point from the rain barrels and the highest point of the PVC pipe. Looks like it might be 9′ high actually and at this point, the PVC has a simple elbow connector that receives the end of the eaves down spout.
It’s resting on a 2×2 that has a piece of scrap metal wrapped around the pipe and screwed into the 2×2. It’s also zip-tied to the 2×2 as best as I could and the 2×2 is zip tied to the fence.
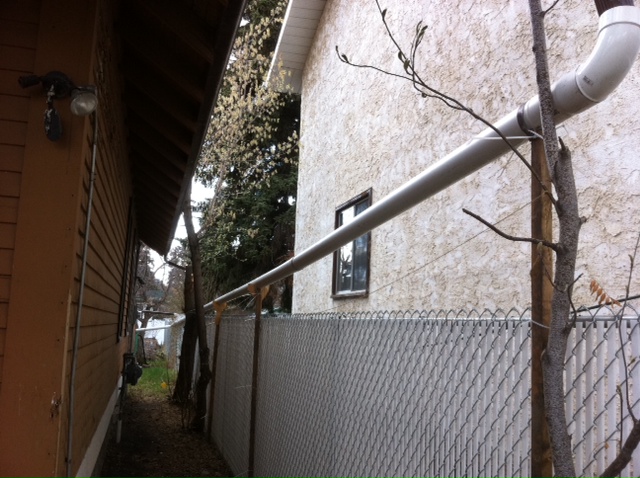
Another View of the Run of Pipe

Just another angle showing the length of run a bit better.
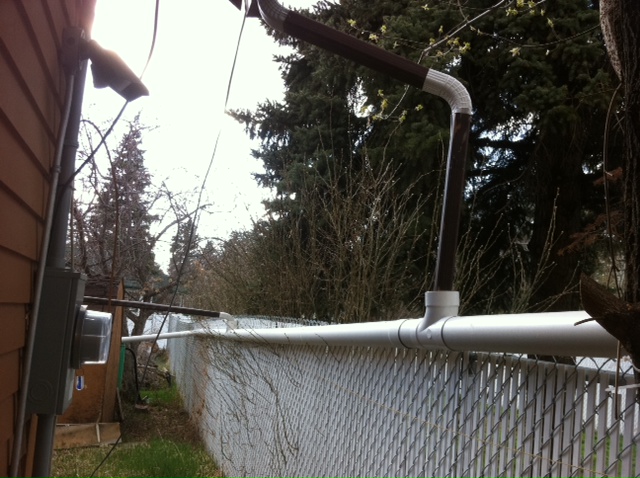
Further Down The Pipe

This shows the rear of the house down spout emptying into the pipe as well as the garage roof (a little further back). The garage down spout was more of a horizontal run of spout that just barely had enough slope for flow. I expect that under heavy rainfall the rain gutter on the garage may fill up, so had to seal the connection at the garage with silicone as best I could to account for loss of water due to dripping there. Should work though.
Supporting The PVC Pipe

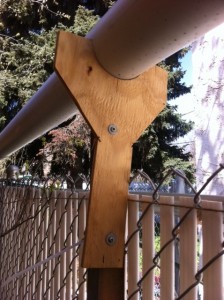
Support for PVC Pipe

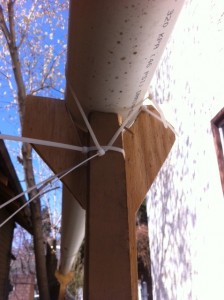
PVC pipe tied to support
The support’s are simply a piece of scrap wood that has a half circle the size of the pipe cut out of it and then screwed into the 2×2. Should be fine by itself (as if it’s going to jump up and out right?), but I zip tied it to the support anyway.
Emptying Into Rain Barrel

The pipe makes a 90 degree turn at the barrel end of the run of pipe and then empties into the barrel. There is a hole about an inch larger than the pipe cut into the top. This allows for any settling or future movement of any sort.
The only thing I have yet to implement is a screen at this end to screen out leaves, squirrel poo or anything else I dont want in the barrels.
Overflow Valve
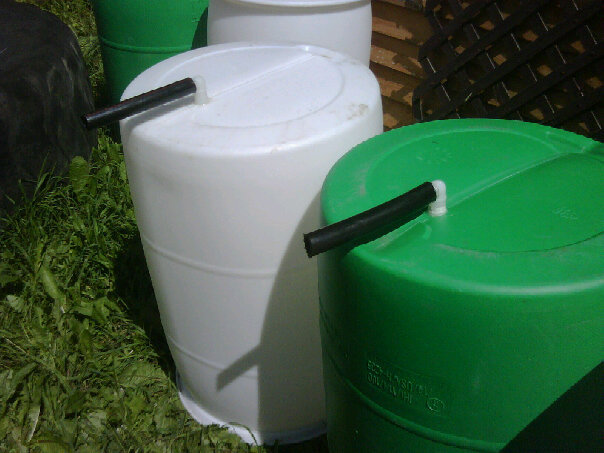
In case of overflow when the barrels fill up (all 220 wonderful gallons of it), I’ve run a sump pump hose from the top of the barrel further back along the fence line towards my compost pile. I figure a little extra soaking would do the pile good.
What is not seen in this photograph is the ability to reverse this little 4′ run of pipe from the fence line and route the pipe down to the ground for winter / spring.
Knowns
- Cost: $22 for each rain barrel, $180 for the PVC pipe (as I recall) and about $35 for the various connector joints and black pipe stuff
- Time To Build: about 4 hours total, not counting drying time for the connectors overnight.
- Durability: It’s made of plastic and PVC. It’ll be here when the dinosaurs come back.
Unknowns
- Breather Holes: I’m not sure if I should be drilling little breather holes into the other rain barrels to allow for air pressure to exit when they’re filling. They should be fine, but I’m not sure
- Rate of fill: I have no idea how fast these will fill because as of the time of this posting, I’ve yet to have more than 2″ of actual water collected in them, plus of course the rate of fill would be dependent on amount of rain falling. I’m not even going to bother trying to figure it out.
- Weight of Water: Dont know and dont care. Barrels are sitting on 3 cinder blocks and those on top of FLAT sidewalk blocks which distribute the weight evenly. I’d not put three upright cinder blocks on the ground as they’d just bite in and the whole thing would likely become unstable.
Cautions and the Future
I’d suggest leaving the valve open in the late fall before winter so that water can leave the rain barrel water collection system. Ice would severely damage the pipes and connectors I’d guess.
As for the future, I’m wondering if I might want to plan in some shade. This came to me a few days ago but at the time of this writing, can’t remember why I thought that might be important. I’m sure it was a brilliant idea though.
Another idea would be to have some sort of other barrel system (albeit smaller) near the compost pile. That way I could route overflow water to another container and not just arbitrarily soak the pile. Some control over compost pile soaking might be a good idea. With the distance and the height though, would have to be a smaller barrel of some sort.
Rain Barrel Advice
I had a guy tell me something once about rain barrels around the time of upcoming rains that I thought I’d pass along. Seems pretty logical and everyone should know this, but I’ll pass it along anyway.
Rain barrels collect water to use at a later date when there’s been less rain or no rain. A rain barrel is only good if it’s storing or collecting rain water.
Therefore: if you KNOW it’s going to rain in the future (a few days or a week away), USE THE WATER in your rain barrels.
Empty them. Water your garden, your trees, soak down your compost and turn it over.
Then when it rains, you’ll have empty barrels ready for collecting rain water for use later.
now.. ideally you’d have a few days of warning which allows for a good soaking of your plants and then time for them to make use of that water before it rains again, but that’s an ideal world isn’t it. However, it goes without saying that when you make use of your rain barrel water collection system, you can target what gets watered down and by how much.
My rain barrel water collection system using 4 rain barrels was a fun little diy project to work on and I’m excited to finally see it collect rain water. After our first rain (and we’ve only had 2 this year so far), I went out to check on them and found it was empty. Worried about leaks, I went out during our second rain only to find that yes it was working but that I had left the hose connector valve open for the winter.


